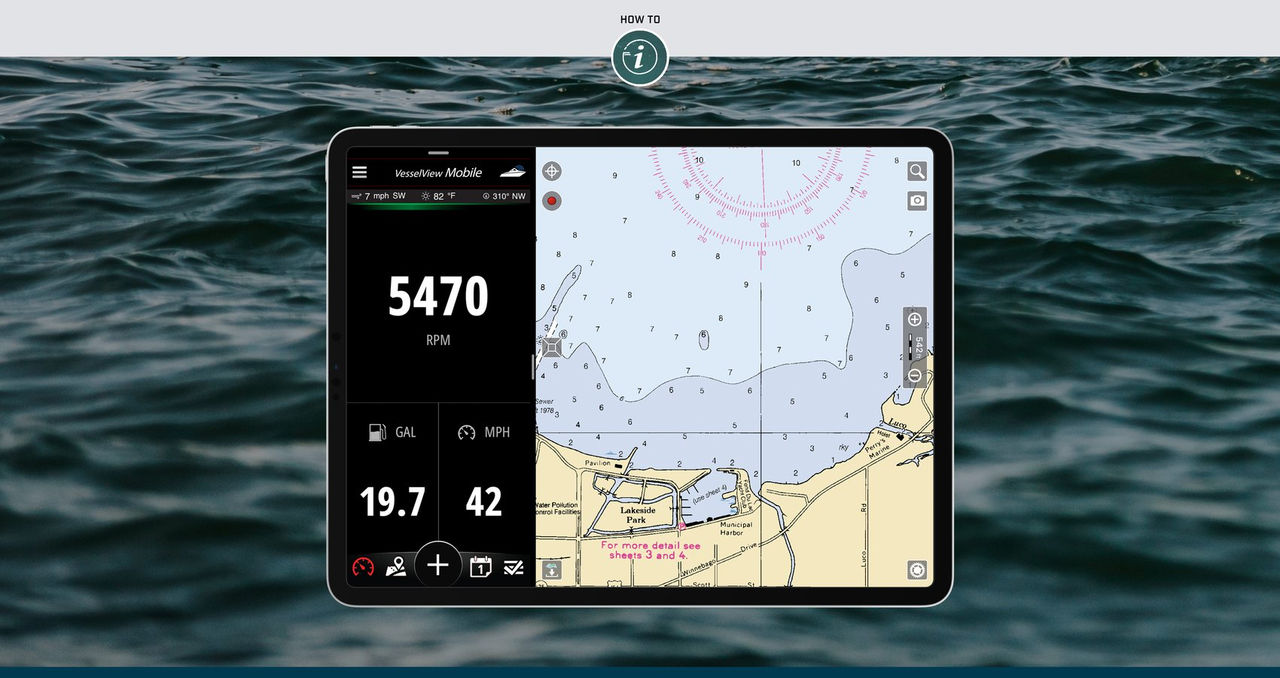
The chartplotter at the helm of your boat is an amazing little box of modern tech magic that puts a chart on an LCD screen, uses GPS to track your position and displays that position on the digital chart, making navigating a breeze. If, that is, you know how to use it. Truth be told, most boaters only learn how to use the chartplotter’s most basic functions. And that’s just fine, because once you have the basics down pat you can navigate just about any waterway.
Reduced to the essential elements and assuming you can read a chart (which is just a map of a waterway), that means knowing how to:
- Set a waypoint on your chartplotter
- Display a steering screen and activate “go to” functions
- Build a route out of multiple waypoints
- Use the “MOB” button
How to Set a Waypoint on a Chartplotter
Waypoints are simply locations you want to identify. They generally appear as a dot or an “X” on the chartplotter screen, but you can usually choose from a whole menu of icons: tiny fish, wreck symbols, rocks and more. Using icons will allow you to glance at and immediately identify the different types of places you choose to save as waypoints, such as fish symbols for fishing spots or anchor icons for your favorite anchorages.
Exactly how you establish them will vary from chartplotter to chartplotter. On most touchscreen units you merely tap the screen in the appropriate location. Then a pop-up menu will appear with one of your options being to create a waypoint where you’ve tapped. On units with keypads, the same thing is generally accomplished by pressing a key to create a waypoint at your current location, or by moving a cursor into position on the chart and then pressing a button.
Steering Screens
You can always look at the boat icon on your chartplotter and get a good idea of your general direction of travel. When navigating, some boaters change their chartplotter from a north-up orientation (where the chart is always presented with north at the top, like looking at a map) to a course-up orientation (where your course line remains straight up on the screen and the chart rotates as you turn). This works just fine for short trips when you have visible landmarks to help you find your way. But this will never help you steer an exact course, and if you try to navigate this way by chartplotter over long distances, you’re bound to do a lot of zigging and zagging. In this situation, you can give your steering accuracy a big boost by using a dedicated steering screen.
These take different appearances on different units, but most have some sort of visible compass rose showing the degree of travel and the degree you need to steer to go to your waypoint. On some others, this data will be displayed in a corner of the map screen. To utilize a steering screen, you’ll first need to learn how to activate the unit’s “go to” function (sometimes called “navigate to”). This may mean tapping on a waypoint or highlighting the waypoint name from a list of waypoints. Then you’ll either press a “go to” button or choose it from a list of options. By glancing at the degree you need to steer to get to your waypoint versus your actual degree of travel, you can make small course corrections and, in most conditions, stay within two or three degrees of your intended course.
Build a Route Out of Multiple Waypoints
Once you get the hang of using waypoints, you can string a series of them together to create a route. This is helpful when you’ll be navigating a twisting river or channel, visiting multiple destinations on one trip, or need to set a course that avoids shoals or obstructions between you and your destination. Most mariners will take the time to set up a multi-waypoint route when preplanning a long or complex trip.
Using the MOB Button
Almost all chartplotters have some form of man overboard (MOB) button or icon. On many touchscreen units, it’s displayed somewhere on the screen at all times. The concept behind the MOB button is that, in case of emergency, such as if you suddenly notice a crewmember is no longer on the boat, you can mark the spot’s coordinates immediately with a single motion. This won’t call for help, but it will allow you to immediately record your position the moment you notice something is amiss. So, it’s important for you to locate the MOB button and familiarize yourself with its function as a matter of safety.
Helpful Chartplotter Navigation Tips
With the basic elements down pat, there are a few more helpful chartplotter functions that will come in handy as you navigate. One of the most commonly used features is displaying a “track.” Set your chartplotter to display a track and it makes a visible breadcrumb trail on the screen, everywhere you go.
Most chartplotters also have tide data stored away in their digital brains. How you access it differs from machine to machine, so you’ll have to do some experimentation or check the owner’s manual to figure out how to display it.
Once you get accustomed to your chartplotter’s user interface and the standard views it presents, you may want to create a custom screen that better serves your needs. Anglers, for example, will often create a custom screen including digital water temperature display, or they may want to arrange a split-screen with chartplotter and depth finder views both showing at the same time. Cruisers might not care to take up screen space with water temps, but may instead opt to add read-outs for fuel consumption or estimated time of arrival.
Remember, we’ve just touched on the basics here. And if your chartplotter is part of a networked multi-function display (MFD) system, you can enjoy advanced functions such as overlaying radar on the chartplotter, displaying engine data, or operating an autopilot or stereo from the very same screen. Naturally, the more extensive and complex your system, the longer it will take to learn how to use it. But one thing is for sure: Figure out these basic functions, and you’ll never have a problem navigating from Point A to Point B again.


