George Poveromo believes that keeping a boat looking sharp is an important part of maintaining pride of ownership. That’s why the host of the TV show “George Poveromo’s World of Saltwater Fishing” pays such close attention to his boats’ specialty graphics, including name decals, boot stripes, wraps and other accents that help complement or create a color scheme unique to his “style.”
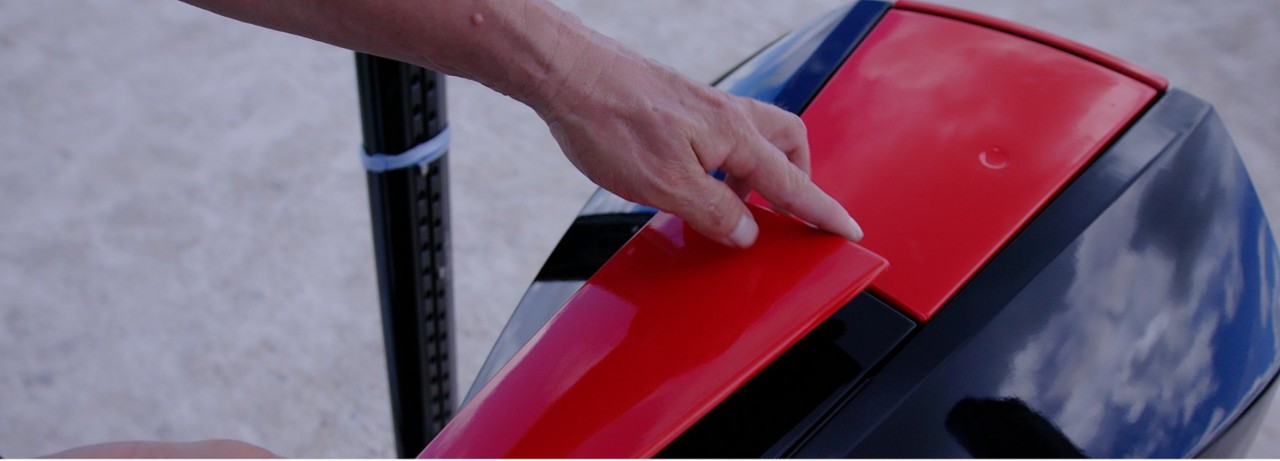
Poveromo’s efforts apply to his Mercury Marine® outboard, too. Among the easiest ways to customize the appearance of a Mercury outboard is to dress it up with new Mercury Color Accent Panels. These thin, durable, factory-painted polycarbonate panels were designed exclusively for Mercury V8 and V6 outboards. They're available in five striking colors: redline red, Pacific blue, Mercury silver, graphite gray and pro black (a matte finish). And for those looking to push the creative boundaries even more, there's a ready-for-paint panel.
Color Accent Panel kits are simple to install thanks to quality adhesive backing and complete instructions for achieving the proper decal placement.
Poveromo recently upgraded the look of his Mako 21 LTS inshore skiff, which he named SHALLOW-WATER MARC, by outfitting the boat’s phantom black Mercury 4.6L V8 225hp Pro XS outboard with contrasting redline red panels. He topped them off with a horsepower decal and the Mercury M-Icon, which he purchased separately.
“The panels were easy to install,” Poveromo said. “Admittedly, I am way more creative than mechanical, but even I completed the task in about 30 minutes. The biggest surprise, however, was how incredibly ‘racy’ the outboard looked once complete.”
The only tools required to complete the installation are a surface cleaner that’s safe to use on an outboard motor, a lint-free rag and a tape measure for accurately placing the decals.
In this video, Poveromo guides you through the installation process that he followed. Each step is also detailed below.
Installing Mercury Color Accent Panels
- In a clean work area, arrange the Color Accent Panels and decals (including horsepower and M-Icon, if you purchased them separately) roughly as they’ll be installed on the outboard. Assemble the necessary tools and instructions page.
- Poveromo suggests performing a “dry run” by placing each Color Accent Panel over the existing panels to see how everything should line up. Be sure you do not peel back the cover from the adhesive backing at this point.
- Clean all the surfaces where the panels will be applied. You also need to remove the existing M-Icon and clean up any adhesive residue left behind. But before you do, it’s helpful to measure the location of the M-Icon and horsepower decals so you can correctly install the new ones (if you’re including them) on the Color Accent Panels. Write down this information in a handy place.
- Apply the exhaust port cover accent panel first. Begin by removing the protective film from the center adhesive strip on the back of the accent panel. Now partially peel back the ends of the protective film from the two side adhesive strips and fold the loose ends out to the side. Work the exhaust port through its opening in the accent panel. Then line up the panel, making sure the ends of the protective film on the side adhesive strips extend out to where they can be grabbed later. Firmly press the panel along its center to affix the center adhesive strip. Now finish removing the protective film from the side adhesive strips and firmly press down to secure the panel.
- Clean the outer surface of the rear accent panel. Then affix the new decals on the rear accent panel using the measurements taken previously. This panel is now ready to be installed on the outboard. Peel back the protective film from the adhesive strips and carefully fit it into place. Press down to adhere it.
- The two top cowling accent panels follow the same procedure. Poveromo suggests installing the oil access accent panel first, followed by the aft accent panel.
- 6. With all the accent panels in place, give the outboard a quick polish to really bring out the luster.
That’s all there is to it. In roughly 30 minutes, a “standard” Mercury outboard can be transformed with a custom look.
“The Color Accent Panels really add an amazing, head-turning touch to a Mercury V6 or V8 outboard-powered boat,” said Poveromo. “The V8 225hp Pro XS outboard on my SHALLOW-WATER MARC makes that boat come alive through its strong torque and power curves. Add in the new redline red accent panels and the boat looks like a real racer, even on its trailer. These panels truly make for an appealing aesthetics package. I'm thrilled with the results. I think it looks sharp!”
See more from Poveromo at GeorgePoveromo.com, or on Facebook, YouTube and Instagram.


